この記事のゴール

Webサーバにapache、ロードバランサにnginxを使用してロードバランシングを実現する。
この記事のファイルは次のようなディレクトリ構造となります。
lb-test
├── apache1
│   ├── Dockerfile
│   └── public_html
│       └── index.html
├── apache2
│   ├── Dockerfile
│   └── public_html
│       └── index.html
├── apache3
│   ├── Dockerfile
│   └── public_html
│       └── index.html
├── docker-compose.yml
└── nginx
    └── default.conf
step1.apache単体で構築する
まずはapacheを単体でwebサーバとして起動してみましょう。
次のようなシンプルなdocker-compose.ymlになります。
version: "3"
services:
  apache1:
    container_name: apache1
    build: ./apache1
    ports:
      - 81:80
    networks:
      - lb-test
networks:
lb-test:Dockerfileもdockerhub apache の記述とほぼ同じです。
FROM httpd:2.4
COPY ./public_html/ /usr/local/apache2/htdocs/
このWebサーバで公開する簡単なHTMLを作成しておきます。
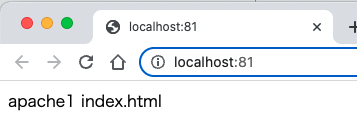
apache1 index.htmldocker-compose up -d によりコンテナを起動して、動作確認してください。

このように表示されていれば、このSTEPはOKです。
step2.apacheを複数台構築する
次に、step1の要領でnginxの振り分け先となるapacheを複数台起動していきます。
version: "3"
services:
  apache1:
    container_name: apache1
    build: ./apache1
    ports:
      - 81:80
    networks:
      - lb-test
  apache2:
    container_name: apache2
    build: ./apache2
    ports:
      - 82:80
    networks:
      - lb-test
  apache3:
    container_name: apache3
    build: ./apache3
    ports:
      - 83:80
    networks:
      - lb-test
networks:
  lb-test:
apache2とapache3を追記しています。
動作確認のため、それぞれ違うポート82,83としておきます。
FROM httpd:2.4
COPY ./public_html/ /usr/local/apache2/htdocs/
Dockerfileはどのapacheも同じです。
(ディレクトリ構造については、もう少し簡略化することは可能です。)
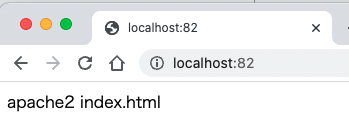
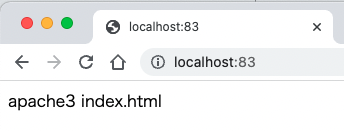
apache2 index.htmlapache3 index.htmlapache2とapache3で違いがわかるようなHTMLにしておきます。
docker-compose up -d によりコンテナを起動して、動作確認してください。


このように、それぞれのapacheが適切に起動できていれば、このSTEPはOKです。
step3.nginxを単体で起動する
用意した3台のapacheに処理を振り分けたいところですが、
まずはnginx単体での起動をしてみましょう。
(STEPを細かく分けると学習につまづきにくくなります)
version: "3"
services:
  nginx:
    container_name: lb-nginx
    image: nginx:1.21
    restart: always
    ports:
      - 80:80
    networks:
      - lb-test
networks:
  lb-test:
docker-compose.ymlにnginxのコンテナを追記します。
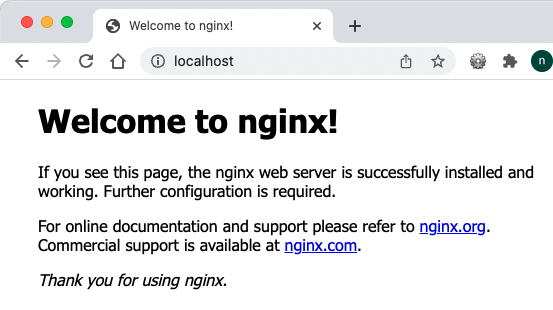
docker-compose up -d によりコンテナを起動して、動作確認してください。

このように、Welcome to nginx! が表示されていればこのSTEPはOKです。
ついでに、nginxコンテナに入って、nginx.confのデフォルト設定を見ておきましょう。
$ docker exec -it lb-nginx /bin/sh
# cat /etc/nginx/nginx.conf

user  nginx;
worker_processes  auto;

error_log  /var/log/nginx/error.log notice;
pid        /var/run/nginx.pid;


events {
    worker_connections  1024;
}


http {
    include       /etc/nginx/mime.types;
    default_type  application/octet-stream;

    log_format  main  '$remote_addr - $remote_user [$time_local] "$request" '
                      '$status $body_bytes_sent "$http_referer" '
                      '"$http_user_agent" "$http_x_forwarded_for"';

    access_log  /var/log/nginx/access.log  main;

    sendfile        on;
    #tcp_nopush     on;

    keepalive_timeout  65;

    #gzip  on;

    include /etc/nginx/conf.d/*.conf;
}
33行目で/etc/nginx/conf.dにある*.confをインクルードしていることがわかりました。
Step4ではこの事を利用して、ロードバランシングの設定を書いていきましょう。
step4.nginxをロードバランサー化し、振り分ける(最終形)
いよいよnginxのロードバランス機能を使用して、各apacheコンテナに処理を振り分けていきます。
version: "3"
services:
  apache1:
    container_name: apache1
    build: ./apache1
    networks:
      - lb-test
  apache2:
    container_name: apache2
    build: ./apache2
    networks:
      - lb-test
  apache3:
    container_name: apache3
    build: ./apache3
    networks:
      - lb-test
  nginx:
    container_name: lb-nginx
    image: nginx:1.21
    restart: always
    ports:
      - 80:80
    volumes:
      - ./nginx/default.conf:/etc/nginx/conf.d/default.conf
    networks:
      - lb-test
    depends_on:
      - apache1
      - apache2
      - apache3
networks:
  lb-test:
この時点で、各apacheコンテナはホストにポートを公開する必要がなくなりますので、各apacheにあった ports: - 82:80 のような記述を削除しました。
upstream web_server {
    server apache1;
    server apache2;
    server apache3;
}

server {
    listen 80;

    location / {
        proxy_pass http://web_server;
    }
}
nginxの設定は難しいですが、これが、ロードバランシングさせる最低限の記述になります。
2-4行目では、各apacheコンテナのサービス名であることに注意してください。
8行目では、このコンテナでnginxは80ポートをlistenすると指定していますので、ブラウザからhttp://localhost/でアクセスできます。
12行目で、/に対するアクセスをhttp://web_serverに振り分けると書いています。
web_serverの名称は何でも良いのですが、1行目のupstremの後の名称と一致させてください。
コンテナ群を起動しましょう。
lb-test $ docker-compose up -d
Creating network "lb-test_lb-test" with the default driver
Creating apache2 ... done
Creating apache1 ... done
Creating apache3 ... done
Creating lb-nginx ... done
ブラウザでアクセスすると、ロードバランシングできてることが確認できます。

これでnginxをロードバランサとして使用できました。
【docker-nginxエラー】nginx: [emerg] no "events" section in configuration
dockerhub nginxの例にあるように、nginx.confをコピーしたらこのエラーが発生しました。
  nginx:
    container_name: lb-nginx
    image: nginx:1.21
    ports:
      - 80:80
    volumes:
      - ./nginx/nginx.conf:/etc/nginx/nginx.conf # NG例です
# NG例です
http {
upstream web_server {
server apache1;
server apache2;
server apache3;
}
server {
listen 80;
location / {
proxy_pass http://web_server;
}
}
}nginx.confをコピーするのではなく、別の設定ファイル(本記事ではdefault.conf)を用意して、/etc/nginx/conf.dにコピーしてあげましょう。
/etc/nginx/conf.d以下のconfが、nginx.confからインクルードされるからです。
【docker-nginxエラー】nginx: [emerg] "http" directive is not allowed here in /etc/nginx/conf.d/default.conf:1
指定されているファイルに文法エラーがあります。
このログでは、default.confに記述しているhttpがおかしい位置にあると怒られています。
NG例
http{
  upstream web_server {
      server apache1;
      server apache2;
      server apache3;
  }

  server {
      listen 80;

      location / {
          proxy_pass http://web_server;
      }
  }
}
OK例
upstream web_server {
    server apache1;
    server apache2;
    server apache3;
}

server {
    listen 80;

    location / {
        proxy_pass http://web_server;
    }
}
このように、インクルードされるファイルにはhttpブロックは不要です。

